2026 Best Oxygen Sensor Adapter for Easy Installation
Choosing the right oxygen sensor adapter can make sensor installation cleaner, faster, and less frustrating. However, not every adapter offers the same fit, material quality, or thread accuracy. A dependable option should match the vehicle’s exhaust layout, sensor thread size, and available clearance. Fit matters. A poorly matched adapter may sit too close to the pipe, contact surrounding components, or create exhaust leaks.
This 2026 guide examines oxygen sensor adapter options through practical installation details and verified product considerations. We focus on stainless steel construction, precise threading, heat resistance, and compatibility with common oxygen sensor designs. We also consider how easily each adapter can be installed in a narrow space, where a short wrench movement may be all that is available. A good adapter should feel solid in the hand, align without force, and maintain a stable seal after repeated heat cycles.
Real-world experience still matters more than attractive product claims. Some listings overpromise. Product descriptions may omit thread depth, sensor clearance, or the need for an additional gasket. That omission can cause confusion during installation. Before purchasing, compare measurements carefully and inspect the manufacturer’s specifications. If the adapter changes sensor placement, confirm that the vehicle’s diagnostic system can read the sensor correctly. Professional advice may be appropriate when the exhaust system is modified or access is limited. The best choice is not always the cheapest one; it is the adapter that provides dependable fitment, durable performance, and a straightforward installation process.
What Is an Oxygen Sensor Adapter and How Does It Work?
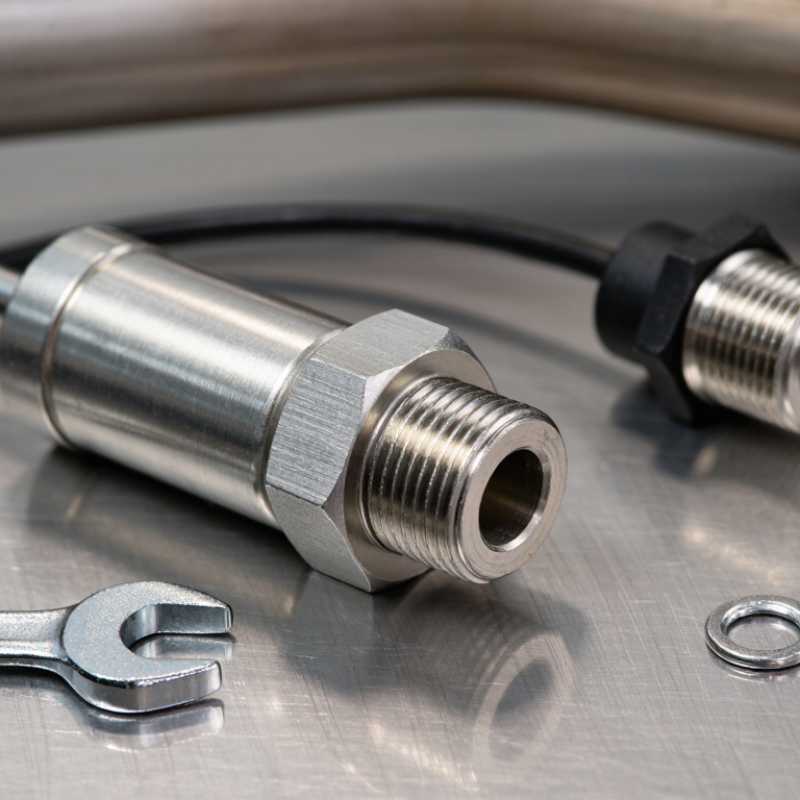
An oxygen sensor adapter is a small threaded fitting placed between the exhaust pipe and the oxygen sensor. It changes the sensor’s position and exposure to exhaust gases. Most adapters use matching sensor threads and a hollow passage. Some include a small catalyst insert or restricted opening.
The sensor measures oxygen levels in the exhaust stream. The engine computer uses this information to adjust fuel delivery and monitor combustion. An adapter can reduce direct exhaust contact, sometimes helping with false readings or clearance problems. It cannot repair a damaged sensor, wiring fault, exhaust leak, or failing catalytic converter. I have learned that thread quality matters more than appearance. My first assumption was wrong.
Installation should begin with a cool exhaust system, the correct thread size, and a vehicle-specific service manual. Remove the sensor carefully, then inspect the old threads and connector. Apply only approved thread treatment, if the sensor instructions permit it. Tighten the adapter to the specified torque, without forcing it. Check for exhaust leaks after starting the engine. A scan tool can confirm whether readings remain stable. Do not use an adapter to bypass emissions testing or disable required monitoring systems. Local regulations may restrict modifications. Some adapters also move the sensor too far from its intended position, creating new fault codes. That detail is easy to miss.
Key Features of the Best Oxygen Sensor Adapters in 2026
The 2026 best oxygen sensor adapter should make installation accurate, stable, and easy to inspect. Fit matters most. Choose an adapter with the correct thread pitch, sensor angle, and exhaust bung size. A 18 mm threaded opening is common, but measurements should confirm compatibility. Heat-resistant stainless steel handles repeated thermal cycling better than thin, soft metal. Look for clean threads and a smooth sealing face. These details reduce exhaust leaks near the sensor tip.
The U.S. EPA’s 2024 Automotive Trends Report shows modern vehicles continue improving fuel economy and emissions performance. That progress depends on precise oxygen feedback from the exhaust system. A poorly aligned adapter can delay sensor response or expose wiring to excessive heat. Industry service guidance also recommends checking connector clearance, wire routing, and sensor depth before tightening. Leave room for a socket. It saves frustration. In practical installations, a tapered thread sealant approved for exhaust temperatures can help, but too much sealant may contaminate the sensing area. I still measure twice, because catalog dimensions are not always exact. The best adapter includes clear specifications, durable hardware, and instructions explaining torque, clearance, and inspection points. Small omissions remain possible, even in well-designed kits.
How to Choose the Right Adapter for Your Vehicle
Choosing the right oxygen sensor adapter starts with fit, not appearance. Check the sensor thread, usually M18 x 1.5, but verify it against your vehicle manual. Confirm the adapter’s thread depth, exhaust temperature rating, and clearance near the floor or heat shield. A poorly positioned adapter can touch wiring or collect condensation. Fit matters.
Match the adapter to the sensor type. Narrowband and wideband sensors do not always respond similarly to altered exhaust flow. SAE J1979 diagnostic guidance shows that oxygen-sensor data supports emissions monitoring and fault detection. The U.S. Environmental Protection Agency’s 2024 Automotive Trends Report also connects emissions performance with precise engine calibration. Therefore, an adapter should support an approved repair, not interfere with monitoring functions. Local inspection rules may differ.
I have seen installations fail because the sensor sat too far from the exhaust stream. The engine then showed delayed readings, even though the threads looked correct. Measure twice. Choose stainless steel or another heat-resistant material, and inspect the sealing surface before installation. The European Environment Agency’s 2024 vehicle-emissions monitoring report reinforces the importance of reliable tailpipe measurement. That makes sensor placement more important than a quick, cheap installation. My own mistake was trusting a universal listing without checking sensor clearance. It fitted, technically. It was still wrong.
Step-by-Step Guide to Installing an Oxygen Sensor Adapter
2026 Best Oxygen Sensor Adapter for Easy Installation
Installing an oxygen sensor adapter starts with correct identification. Match the adapter’s thread size, sensor type, connector, and exhaust position. The upstream sensor usually monitors fuel mixture, while the downstream sensor checks catalytic converter performance. Service manuals remain the most reliable reference. Do not rely on appearance alone.
Park on a level surface and let the exhaust cool completely. Raise the vehicle with approved stands, not a jack alone. Disconnect the negative battery cable when the service manual permits it. Remove the old sensor carefully, then inspect the exhaust threads with a light. Clean damaged threads gently. Start the adapter by hand to prevent cross-threading. Apply anti-seize only when the adapter instructions allow it. Excess compound can contaminate the sensing element. Torque the adapter and sensor to the specified value. Route the wiring away from hot pipes and moving parts. A neat installation matters.
Tips: Photograph the original wiring first. Keep the connector dry. Never force a tight fit.
Reconnect the battery and scan for stored codes. Clear codes only after recording them. Start the engine and check for leaks around the adapter. Monitor oxygen-sensor data during a short road test. Readings should respond smoothly, not remain fixed. The U.S. Environmental Protection Agency’s 2024 inventory reports that transportation produced about 28% of national greenhouse-gas emissions in 2022. Small repairs still deserve precision. I sometimes recheck connector seating twice; that extra minute prevents frustrating diagnostic work. Perfect installation is not guaranteed without the vehicle’s exact specifications.
2026 Best Oxygen Sensor Adapter: Installation Time Guide
This chart shows typical DIY installation times for a universal oxygen sensor adapter. Actual time may vary with corrosion, access to the sensor, and the vehicle’s exhaust layout.
Safety Checks and Common Installation Mistakes to Avoid
2026 Best Oxygen Sensor Adapter for Easy Installation
Safety Checks and Common Installation Mistakes to Avoid
A safe oxygen sensor adapter installation begins with a cold exhaust system. Hot metal can cause severe burns and damage nearby wiring. Park on level ground, engage the parking brake, and support the vehicle with approved stands. Never rely on a jack alone. Wear safety glasses, then inspect the sensor port for carbon, damaged threads, or unusual corrosion.
Confirm that the adapter matches the sensor thread and exhaust fitting before applying force. A poor match may create leaks or cross-thread the port. Clean the threads gently, but avoid pushing debris into the exhaust opening. Use only a small amount of suitable thread compound on the threads. Keep it away from the sensing tip. Too much compound can contaminate the sensor and produce inaccurate readings.
Hand-tighten the adapter first. It should turn smoothly. If it binds, stop and realign it. Overtightening is another common mistake; it can strip aluminum threads or make future removal difficult. Route the wire away from heat, sharp edges, and moving parts, leaving enough slack for engine movement. Check the connector until it clicks firmly. I sometimes recheck this step twice, because a clean installation can still fail through one loose connection.
After installation, inspect for exhaust leaks around the fitting. Start the engine outdoors, listen for tapping sounds, and watch for warning signs. A short scan and careful road test can reveal problems that visual checks miss.