How to Choose an Integrated Solar LED Street Light?
Choosing an Integrated Solar Led Street Light is not just a matter of comparing brightness or price. The right unit must match the road, available sunlight, and expected nightly operating hours. A quiet village lane needs different coverage from a busy parking area. Start with the actual site.
Check the light’s lumen output, beam distribution, battery capacity, and solar panel rating together. These figures describe different parts of the system. A bright lamp may still dim early if its battery is undersized or winter sunlight is limited. Ask manufacturers for runtime details under specific operating modes, not just ideal conditions. Look for clear specifications and warranty terms. Small details matter.
Site conditions deserve equal attention. Note nearby trees, building shadows, pole height, mounting direction, and seasonal weather. A panel that receives good midday sun may perform poorly beneath a growing tree. Consider motion controls or dimming schedules where suitable, but confirm how they affect illumination and runtime. Installation access matters, too. A difficult-to-reach battery can make routine checks frustrating.
There is no perfect fixture for every location. That sounds simple. It isn’t. Compare products using consistent specifications, and verify claims in the manufacturer’s documentation. Ask about battery replacement, component availability, and maintenance procedures before ordering. If the project is large, test one unit on site before committing to a full installation. Real conditions can expose assumptions that a brochure cannot. A careful choice balances reliable lighting, practical upkeep, and the site’s actual solar resources.
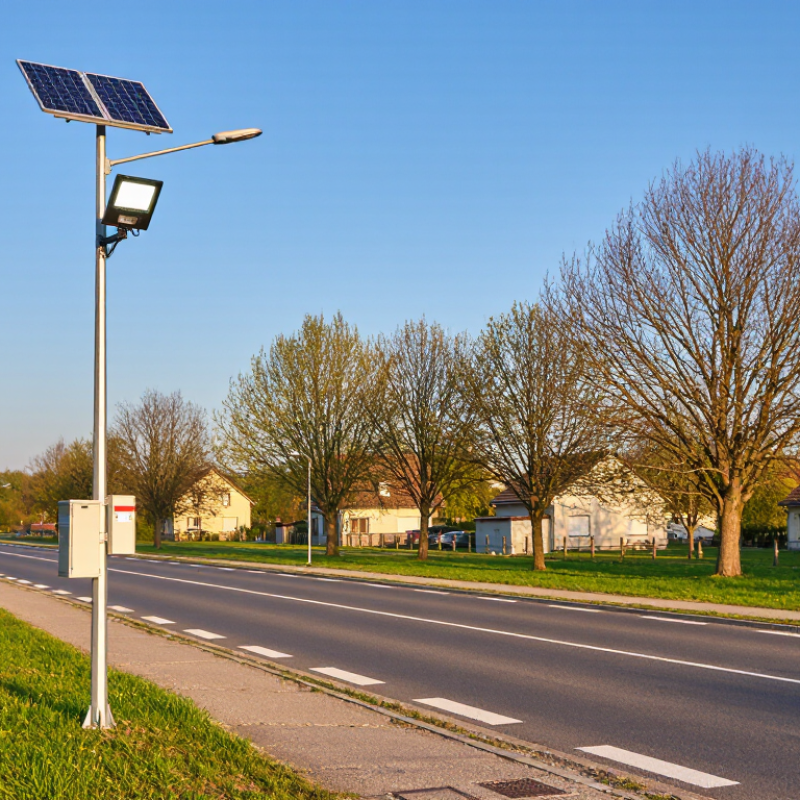
Assess the Site, Climate, and Required Lighting
Start at the pole location, not the product catalogue. Note nearby trees, buildings, road bends, and whether winter shadows reach the panel. The World Bank and ESMAP’s Global Solar Atlas reports long-term monthly global horizontal irradiation (GHI) and estimated PV output by location. Compare the weakest month, in kWh/m²/day, rather than relying on an annual average. NASA POWER also provides solar and weather data for checking local temperature and seasonal patterns. Small details matter. A panel shaded by bare branches can still lose useful charging time.
Then define what the road needs: its use, width, conflict points, and the light level expected across the pavement. IES RP-8-22 sets roadway-lighting guidance by road and application type; it does not offer one universal lumen target. Check both average light and uniformity, especially at crossings and bends. Also assess glare for drivers and pedestrians. Ask how many cloudy or snowy nights the system must cover, and size storage around the local low-sun period. One judgment call remains: a map cannot capture every shadow or storm, so a site visit may change the design.
Match LED Output and Optics to the Road
How to Choose an Integrated Solar LED Street Light?
Match LED Output and Optics to the Road
Choose light for the road, not for the product’s maximum lumen rating. A narrow residential street, a wide junction, and a pedestrian crossing need different beam patterns and light levels. The Illuminating Engineering Society’s RP-8-22 roadway-lighting recommendations distinguish criteria by road type and conditions, so one output target does not fit every site. Aim for usable light. Check the pole height, spacing, road width, and mounting angle together. A poorly matched optic can send light into trees or house windows while leaving the pavement dim.
Look for a distribution that puts light where people travel, with even coverage between poles. Sharp, controlled optics can reduce spill and help preserve battery power through long winter nights. The U.S. Department of Energy’s LED lighting fact sheet reports that LEDs use at least 75% less energy than incandescent lighting; that comparison is not a solar-streetlight performance guarantee, but it shows why efficient output matters. Ask for photometric files and a layout based on the actual road dimensions, not a generic illustration. Still, calculations can mislead. Nearby trees, wet pavement, and dusty lenses change real conditions. Review the site after installation, then adjust aiming or spacing if dark gaps remain.
Check Solar Panel, Battery, and Autonomy Capacity
An integrated solar LED street light should be selected as a system, not by panel wattage alone. Check the panel’s rated output and compare it with the lamp’s daily energy use. A 40-watt lamp running for ten hours needs about 400 watt-hours each night, before system losses. Ask for test data or a clear energy calculation, not just a headline specification. Small details matter.
Battery capacity determines how much energy can be stored for nighttime operation. Confirm its usable capacity, chemistry, and operating temperature range; nominal capacity is not always fully available. Ask how the controller protects the battery from overcharging and deep discharge. Cold nights can reduce performance. That matters in exposed sites, where winter temperatures and long nights can coincide.
Autonomy describes how long the light can operate with little or no useful sunlight. Compare the stated number of days with local cloudy-weather patterns and the required lighting schedule. For example, three days of autonomy may sound adequate, but it could be marginal if the site often experiences several overcast days in a row. I would check whether the quoted figure assumes full brightness every night or a dimmed schedule. Estimates are useful, but real weather is less tidy than a spreadsheet.
Evaluate Controls, Materials, and Environmental Ratings
Controls determine whether an integrated solar LED street light suits its location. Check for adjustable dimming schedules, not just an automatic dusk-to-dawn setting. A motion sensor can raise output when pedestrians approach and lower it during quiet hours. Ask how long the light stays bright after activation. Test the settings on paper against real traffic patterns. They rarely match perfectly.
Materials matter outdoors. Look for a corrosion-resistant housing, sealed cable entries, and a lens that resists yellowing from ultraviolet exposure. Aluminum can shed heat well, but its finish and fasteners also need protection. Small details count. Inspect joints and mounting hardware, where water can linger. A light can look sturdy and still have weak seals.
Read environmental ratings against the actual site conditions. An IP rating describes resistance to dust and water; it does not guarantee protection from salt air, chemical exposure, or impact. Check the manufacturer’s stated operating temperature range, too. Battery performance may fall during prolonged cold, while intense heat can shorten service life. Request test documentation, and compare it with the installation environment. One spec sheet won’t answer everything. If the site gets strong wind, verify the pole and fixture have suitable load ratings. I would leave room for uncertainty: local shade, dust, and seasonal weather can change charging results more than expected.