
Universal Pumping | High Pressure Pumps
High Pressure Pumps for Difficult to Pump Slurry, Sludge, and Food Waste.
In 2026, choosing a Marine Induction Cooker is not simply a matter of selecting the highest-wattage model. A galley’s available space, electrical system, and daily cooking habits matter just as much. On a small sailboat, a compact single-zone unit may leave more counter room; on a larger vessel, multiple zones can make meal preparation easier.
Power is critical. Check the cooker’s rated voltage and load against the vessel’s inverter, battery bank, or generator specifications before buying. A high-output appliance can be a poor match for a limited power system. That detail is easy to miss. Cookware matters, too: induction requires compatible magnetic-base pots, and a simple magnet test can help confirm suitability.
Marine conditions add another layer. Salt spray, movement, secure installation, cleaning access, and manufacturer guidance all deserve attention, though no single feature guarantees long service life. This guide explains how to compare cooking performance, power demand, controls, dimensions, safety features, and after-sales support. It also considers whether a portable or built-in design better fits your galley. There is no universal winner. A sensible choice balances dependable operation with realistic energy use, rather than relying on marketing claims alone. Details vary by vessel, so verify specifications with the manufacturer and consult a qualified marine electrician when installation affects onboard wiring. Sometimes the cautious answer is the useful one.
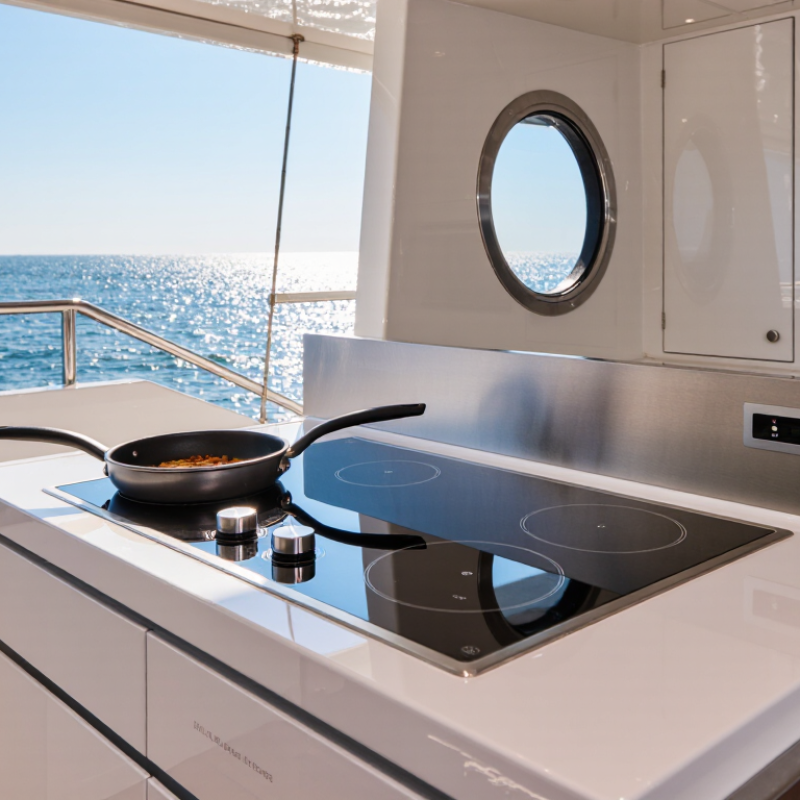
A marine induction cooker is an electric cooktop intended for use aboard a boat. It heats compatible cookware through an alternating magnetic field, rather than heating a burner directly. Beneath the smooth glass surface, a coil produces that field when the cooker is switched on. The pan matters. Its magnetic base develops heat, which then cooks the food. The glass may become warm from contact with the pan, but it is not the primary heat source. Power settings usually adjust the energy supplied to the cookware, giving cooks quick control over simmering or boiling.
Onboard use adds practical checks. The cooker must match the vessel’s available electrical supply, such as shore power or an inverter system. Check its rated voltage and power draw against the boat’s wiring and power capacity; a high setting can strain a limited system. Secure installation matters when the hull moves, and the surrounding counter needs suitable clearance and ventilation as specified by the manufacturer. Use flat-bottomed cookware that attracts a magnet. A small test helps. One easy detail to miss is that “marine” does not automatically mean every unit is suitable for every boat or exposed to spray. Fit and electrical compatibility deserve a second look, even when the cooktop seems straightforward.
Marine cooking begins with the boat’s power system, not the cooker’s appearance. A typical portable induction unit may draw around 1,800 watts at full power. That can exceed a small inverter’s continuous rating. Check both the cooker’s rated input and the inverter’s continuous output, not just its peak figure. Then account for conversion losses and other appliances running at the same time. Small details matter. A kettle, refrigerator, and cooker can quickly make a modest system feel undersized.
Battery capacity also affects how long you can cook away from shore power. A high-wattage setting may drain a battery faster than expected, especially during a long meal. Review the battery’s usable capacity and charging options, and ask a qualified marine electrician to check any uncertain wiring or inverter limits. On a dock, confirm that the shore-power supply can support the cooker alongside the boat’s other loads. Test your usual pan and meal at anchor before relying on the setup. Measure twice. Also consider where the unit will sit: a stable, dry work surface and clear space around it help make cooking more practical underway. It is easy to focus on maximum heat and overlook daily power needs.
Compare an example cooker load with a suggested inverter capacity that includes a 25% planning margin.
These power levels are illustrative, not universal cooker specifications. Check the cooker’s nameplate and the inverter’s continuous rating before choosing equipment. Actual onboard requirements also depend on inverter efficiency, battery voltage, wiring, and other loads running at the same time.
A marine induction cooker should fit the boat’s electrical system before it fits the galley. Compare its rated wattage with the inverter or generator’s continuous capacity, and check voltage requirements in the installation manual. A powerful unit can heat quickly, but it may compete with pumps or refrigeration when several loads run together. Easy to miss.
Look beyond heating speed. Compare the number and size of cooking zones with the pans you actually carry; compact cookware may not register on oversized zones. Check control response with damp fingers or light gloves, plus the lock, overheat protection, and residual-heat indicators. For a moving vessel, secure mounting and a corrosion-resistant housing matter as much as sleek glass. Confirm ventilation clearances and cutout measurements before ordering.
Tips: Measure the countertop twice, then compare the installation drawing, not just the cooker’s listed dimensions. Ask a qualified marine electrician to verify circuit capacity and cable sizing. I would recheck the ventilation gap, too; small galley spaces make that detail surprisingly easy to miss.
| Feature to Compare | Portable Single-Zone Cooker | Built-In Single-Zone Cooker | Dual-Zone Cooker |
|---|---|---|---|
| Best suited for | Small galleys, occasional cooking, or boats where a removable appliance is useful. | A permanent galley installation with limited counter space and regular cooking needs. | Larger galleys and crews that need to cook multiple dishes at once. |
| Typical cooking zones | 1 | 1 | 2 |
| Typical rated power | About 1.4–2.0 kW | Often about 1.8–3.0 kW | Combined input commonly about 3.0–7.0 kW; check whether the rating is shared or per zone. |
| Electrical supply to check | Match the cooker's voltage and frequency to the boat's AC supply, commonly 120 V or 230 V, 50/60 Hz depending on the vessel. | Confirm the boat's AC voltage, frequency, circuit capacity, and installation requirements. | Confirm that the supply can support the cooker's maximum combined load, including when both zones operate. |
| Illustrative current at rated power | A 1.8 kW load draws about 15 A at 120 V or 7.8 A at 230 V. | A 3.0 kW load draws about 13 A at 230 V; at 120 V it would draw about 25 A. | A 3.6 kW combined load draws about 16 A at 230 V. Actual current depends on voltage and the appliance's power settings. |
| Inverter or generator compatibility | Check continuous output capacity, startup behavior, and other loads running at the same time. Allow for conversion losses when estimating battery demand. | Verify that the inverter or generator can continuously supply the cooker's rated input and that the circuit is correctly sized. | A higher-capacity AC system may be needed, especially if both zones and other galley appliances run together. |
| Installation and movement | Choose a stable, level surface and a secure way to stow or restrain the unit at sea. Keep it clear of edges and water exposure. | Check cutout dimensions, clearances, ventilation, mounting method, and any required restraints in the installation manual. | Check cutout size, countertop support, ventilation, and secure installation for the larger appliance. |
| Cookware compatibility | Use flat-bottom cookware that a magnet sticks to, such as compatible stainless steel or cast iron. Check the minimum and maximum pan diameter. | Confirm pan-size limits and that cookware sits fully within the marked cooking area. | Check pan-size requirements for each zone and whether the zones can accommodate your usual cookware simultaneously. |
| Controls and useful functions | Look for clearly marked power or temperature settings, a timer, and controls that are easy to use in a compact galley. | Consider a residual-heat indicator, child lock, timer, and simple controls that remain accessible after installation. | Compare independent zone controls, power-sharing behavior, timers, and how the appliance limits total input. |
| Cleaning and durability | A smooth glass-ceramic surface is easy to wipe clean. Protect it from impact and store it securely when not in use. | Check cleaning instructions, resistance to galley spills, and whether the finish is suitable for the planned installation environment. | Consider the larger surface area, spill cleanup, glass protection, and access for maintenance. |
| Marine-use safety checks | Do not assume a household portable cooker is marine-rated. Follow its manual and secure it against movement. | Verify that the appliance and installation are appropriate for the vessel's environment; have AC wiring and protection checked by a qualified marine electrician. | Check appliance approval, installation clearances, circuit protection, grounding, and vessel-specific requirements with a qualified marine electrician. |
| Practical choice | A good fit when portability and a lower single-appliance load matter most. | A good fit when a neat, fixed installation and one cooking zone meet your needs. | A good fit when two-zone convenience justifies the greater power and installation demands. |
Figures are typical examples for comparison, not specifications for a particular cooker. Always use the appliance nameplate and installation manual to confirm voltage, current, clearances, and circuit requirements.
A marine induction cooker needs a stable, level mounting surface and secure fasteners that can withstand vessel movement. Check the manufacturer’s required clearances before cutting a counter, and keep the unit away from spray and standing water. A qualified marine electrician should confirm the circuit, cable size, and overcurrent protection match the cooker’s rating and the vessel’s power system. Small details matter.
Induction does not burn fuel at the cooktop, but cooking still releases steam, heat, and odors. Provide effective extraction or ventilation, and do not block nearby air inlets. The U.S. Department of Energy’s Energy Saver guidance estimates induction transfers about 85% of its energy to cookware, making pan contact and compatible cookware important. Test ventilation while cooking, not just with the cabin empty.
Electrical demand deserves a careful check. Compare the cooker’s rated wattage with the inverter’s continuous capacity and other loads running at the same time; a kettle can push a marginal system over its limit. The U.S. Coast Guard recorded 564 recreational-boating deaths in 2023, a broad reminder that onboard safety relies on multiple precautions. Keep the operating instructions accessible, and verify the installation against applicable marine electrical standards. I would recheck connections after the first few trips; vibration has a way of exposing assumptions.
2026 How to Choose the Best Marine Induction Cooker?
How to Assess Durability, Efficiency, and Ongoing Care
A marine induction cooker must handle more than daily meals. Salt air, vibration, and limited ventilation can challenge its casing, controls, and electrical connections. Check the installation manual for required clearances and ventilation, then confirm your boat’s inverter and battery system can support the cooker’s rated load. A sturdy surface and secure mounting matter when the boat moves. Small details count.
Efficiency affects time aboard. The U.S. Department of Energy’s Energy Saver guidance estimates that induction transfers about 85% of its energy to food, compared with roughly 32% for gas cooking. Actual onboard performance depends on the power system, cookware, and cooking habits. Test pots with a magnet; compatible bases should attract it. I still find real-world load planning easy to underestimate.
Tips: Wipe spills after the surface cools, using a soft cloth and a cleaner approved by the manufacturer. Keep air vents clear, inspect cables and fittings regularly, and avoid abrasive pads that can scratch glass. If a connection feels loose or unusually warm, stop using the unit and have a qualified marine technician inspect it.
Universal Pumping
625 Apache Trail
Woodstock, GA 30189
Mon - Fri | 9:00 AM - 5:00 PM
Universal Pumping is staffed with industry professionals with 20-45 years experience with high pressure pumping systems. We represent only the “elite producers” in pump manufacturing: Britain’s EMS and Germany’s EMMERICH. Our engineering and manufacturing approach is conservative, and we do not use “guess work” in the design or sales of our pumping and filtration equipment.


